Showing posts with label Recipe Monday. Show all posts

Saturday, March 16, 2019

Painted Seasons Part of my Story Woodland Weaving

In the second of the posts I am making about One Sheet Wonders, I used the bottom right quadrant to create this card using the Woodland/Mushrooms/Autumn pattern from the Painted Seasons Designer Series Paper.  This four rectangle design is on a piece of 5" X 3-3/4" Pumpkin Pie cardstock.  The little mushrooms are adorable to me.

I included this second picture because the rectangles will always look better/neater/more symmetrical on the larger 5-1/4" X 4" layer shown below, but I felt I needed the Crumb Cake layer above to make the card less loud and reduce the clash between Pumpkin Pie and Poppy Parade.

This close-up shows that I used the Poppy Parade marker to highlight "you" amidst the Crumb Cake sentiment.  Then the Story Label Punch adds interest on top of a Poppy Parade Oval.  The Old Olive, Crushed Curry and Pumpkin Pie markers were used to make a gradient on the leaves stamp and dies at the top right and bottom left.  Old Olive and Crumb Cake Linen Thread was used to create a design under the sentiment layer. I like the idea of "weaving" the thread into the story.

Be sure and check back on Tuesday for the next One Sheet Wonder card due to Simple Sunday and More Monday.

Product List


Thanks for hopping by and reading!


Receive my weekly customer newsletter:

Shop anytime on my Stampin' Up! website:
and Earn Bunny Money Rewards!

Tempting sale items:

Free Tutorials:

Join My Team:

Friday, November 30, 2018

Food Friday Lasagna Soup


I recently added a new recipe to my list of winter soups we enjoy, so I thought I'd share here.

It is Lasagna Soup and can be made in the slow cooker after browning the ground beef, but I just continued in the same pan, and it was ready in about 30 minutes with much less mess.

Ingredients:

  • 1 lb ground beef-I used 93% lean
  • 1/4 cup diced onion
  • 1 pack of McCormick Thick and Zesty Spaghetti mix
  • 15 oz petite diced tomatoes with juice (or crushed tomatoes if your children don't like pieces)
  • 8 ounce can tomato paste
  • 1 tsp minced refrigerated garlic (or fresh if you'd like of course)
  • 1/2 tsp dried basil
  • 6 cups chicken broth
  • 1/2 cup heavy cream
  • 3/4  cup Parmesan cheese (real shredded)
  • 12 ounces of bow tie pasta
  • Shredded mozzarella or parmesan for garnish and deliciousness

Directions:

  1. Brown the ground beef with the onion. Then, add the Spaghetti mix.
  2. Add next 5 ingredients, and bring to a boil.
  3. Add heavy cream, and then add bow tie pasta cooking at least as long as package directions.
  4. When pasta is tender, dish into bowls, and serve with shredded mozzarella or parmesan on top.

Monday, June 28, 2010

Recipe Monday #27 Easy Chicken Gnocchi Soup

I love the Chicken and Gnocchi Soup at Olive Garden, so when I saw gnocchi for sale at a local Italian restaurant/store, I had to give it a try.

I started with some recipes on line.  There seemed to be only one out there, so I started with it.  Many of the comments said "make a roux" (and used 1/3 cup of flour and butter), but in all the times I've eaten the soup, it never seemed that thick. My recipe is not as rich/buttery...I believe that is due to the Alfredo Sauce not being as buttery as Olive Garden's Alfredo Sauce.

So this is what I did:

Ingredients:
1 pound of cooked diced chicken (seasoned and baked in the oven for about 20 minutes) (I think they just boil it in the soup at my Olive Garden-it is always pink-ish which wigs me out!)
Butter (I used Smart Balance 1/2 butter sticks)
Bertolli AlfredoSauce (1/2 jar--the reason I didn't need to make a roux)
1/4 cup chopped onion
1/2 of a grated carrot (approx 1/4 cup)
1 clove of minced garlic (or use garlic powder-maybe 1/8 tsp)
1/4 tsp Italian Seasoning
1 package (approx 16 oz/1 pound) of gnocchi
1 cup fresh baby spinach
2 cartons of Swanson's Chicken Broth +2 cups of water
1 Tblsp Grated Parmesan Cheese

Melt 2 tablespoons of butter in a large soup pot. Add onion and garlic....Cook but do not allow to burn.  Add 2 cartons of Swanson's Chicken Broth and 2 cups of water. Add Italian Seasoning. Grate carrot and add to broth. Bring to a boil. Add Parmesan Cheese and chicken. Return to a boil.  Add baby spinach and return to a boil. (I like my spinach to lose its color, but if you don't, wait and add it with the gnocchi.) I let it boil about 5 minutes and then add gnocchi.  Once the water returned to a full boil, I cooked the gnocchi for 2 minutes more. (You may need to adjust to the directions given on the package.)

This makes about 8 or 9 medium size bowls of soup.


Monday, March 29, 2010

Recipe Monday #25 Chocolate Puffs and an easy card...

Today's Chocolate Puffs Recipe is so easy and fun. I served these at Chicks and Chocolate last Thursday.

Ingredients:
Milk (just for brushing the tops of the pastries)
Spray cooking oil
about 3 Hershey bars, regular size
1 package of Pepperidge Farm puff pastry sheets

1. Thaw your puff pastry and preheat oven to 400F.  Spray your cookie sheet with oil.
2. Place the first puff pastry sheet on pastry board (or clean countertop). Cut the pastry into three strips at the folds.  Then cut the pastry into 5 approximately equal horizontal strips.
3. Put a small rectangle from a Hershey bar on each rectangle.  Roll the pastry around the chocolate, and put it on the cookie sheet seam side down.  Continue for 15 little puffs.
4. Brush milk onto the top of each and spring with coarse sugar.
5. Repeat with second pastry sheet for a total yield of 30 puffs.
6. Place in the oven and cook for 18-20 minutes. Cool for at least 5 minutes. Serve warm.


Finally I'm able to get a card uploaded...sorry about the picture problem!  This card is a CASE (copy and share everything (not everything-there were changes, but that is what CASEing stands for) of the card on page 13 of the Stampin' Up! big catalog.  We made simple cards that would be easy to reproduce at home at class last Thursday.


Monday, March 22, 2010

Recipe Monday #25 Fruit Pizza and A Butterfly Bookmark Pocket Card

Fruit Pizza is an old favorite that is still yummy!

Ingredients:
1 tube refrigerated sugar cookie dough

1 8 oz pkg cream cheese, softened
1 cup powdered sugar
1 tsp vanilla
Seasonal Fruits -I like slices of Kiwi, Strawberries, Bananas and Mandarin Oranges and Grapes (sliced in half).

Press the dough evenly into a pizza pan and bake about 15-20 minutes at 350F.
Using a mixer, whip the softened cream cheese and powdered sugar until it is smooth.  Then add vanilla. (Be careful not to sling the sugar out of the bowl.)
Arrange the fruit slices onto the pizza beginning in the center in concentric circles for a pretty presentation.
Serve as soon as possible.

Today's card has a pocket that holds a butterfly bookmark.  It is another from the Vintage Vogue One Sheet Wonder (which will be posted tomorrow).  I stamped the for you from the Great Friend set directly onto the  diagonal cut cardfronts and used a leftover piece from the OSW page for the butterflies (by tearing the scrap to fit the butterflies I wanted from the Beautiful Wings Embosslit by Stampin' Up! ).  I also used the "other" side of the cardstock from cutting Pretty in Pink Fancy Favor boxes for the diagonal edge and backed each butterfly with Old Olive cardstock. About 8 inches of Pretty in Pink Satin Ribbon and some rhinestones from the Eggcellent Eggs kit finished the bookmark.

Monday, March 15, 2010

Recipe Monday #24 Braised Beef Tips and You're Invited to Join my Team!

Braised Beef Tips
1½ lbs of beef sirloin tip (a sirloin steak can be substituted)
1c flour
1 tsp salt
4 Tbsp butter or margarine
½ c chopped onion
1 clove garlic, minced
½ lb mushrooms, sliced
1 c beef bouillon
1 c red wine
1 Tbsp Worcestershire sauce

Cut meat into 1-inch cubes. Blend flour and salt then coat meat cubes. Melt butter in a deep skillet or a roasting pot. Add meat and brown. Transfer meat to a 3-quart casserole. Add onion, garlic and mushroom to butter in roasting pot. Cook over medium heat until onion is soft but not brown. (About 5 minutes)

Then add bouillon, wine and Worcestershire sauce to mixture. Stir to blend. Pour the contents of the roasting pot over the meat in the casserole dish.

Cover and Bake at 350 F for 1 1/2 hours or until meat is tender. If, after baking, the gravy is too thin, thicken it with flour on the stovetop.

Serve over noodles. Rice or potatoes may be used for a change.

Serves 4 adults.


You're Invited to Join my Team! I'd be happy to tell you more about Stampin' Up! and support you as you grow a business or as you grow your hobby! Just email me for information if you're interested!  This page was made using My Digital Studio and was fun and easy to make.

Fan my Facebook page: http://www.facebook.com/home.php?sk=lf#!/pages/Edmond-OK/Rhonda-Griffin-Independent-Stampin-Up-Demonstrator/311456514198?ref=ts between now and March 31 to enter a drawing to win a FREE Very Thankful Stampin' Up! Stamp Set.

Monday, March 8, 2010

Recipe Monday #23 Tater Tot Casserole and a Tiny Tot Technique

For comfort food from the way back machine...nothing beats

Tater Tot Casserole

1 lb ground beef
2 c cheddar cheese
2 Tbsp chopped onion
1 can of cream of chicken or cream of mushroom soup
1 can of cheddar cheese soup
30-40 tater tots
Brown ground beef. Add the onions about 5 minutes before ground beef is finished.

In a 9”x11” casserole dish, put one half of the ground beef and then the cream of chicken or mushroom soup. Add the other half of the ground beef and then the cheddar cheese soup. Cover with grated cheese and with tater tots.

Bake at 350 F for 1 hour.

I typically double or triple this recipe and freeze them in 8X8 aluminum pans so that I have something quick on hand when I need it.

Tuesday's Technique Challenge on Stampin' Addicts is Bubble Wrap Background.  It makes a cute mod background or bubbly look and sort of makes a faux honeycomb look for a beehive card too.   It is so simple that I can hardly bring myself to type instructions. :)

1. Press your bubblewrap onto your stamp pad several times to ink up the bubble wrap.
2. "Stamp" your bubble wrap onto your cardstock.
3. Finish your card as you wish.

My new creation is for Stampin' Up!'s Simply Adorned 1-1/4 X 1 inch charm, and it uses the Hostess Level One Set from the Occasions Mini Catalog called Picture This.

I made this card using the Just Buzzing By set in 2008, but it is still a decent example:


Monday, March 1, 2010

Recipe Monday #22 and Scratch N Sniff Margaritas

Today's Recipe is for Shortbread Cookies

Ingredients:
1 cup softened butter
1/2 cup superfine sugar
1/2 cup confectioners' (powdered) sugar
2 cups all-purpose flour
1/2 tsp almond extract (if desired)
thinly sliced almonds

Prehate oven to 300 F. Whip butter for 10-15 minutes until butter is white and fluffy. Add the two types of sugar. Whip again thoroughly.  Blend in the flour until a medium soft dough is formed.  On a floured surface, quickly roll into rope shapes (approximate diameter 2 inches) and cut into 1-1/2 inch pieces on the diagonal.

Place on a cookie sheet and add a couple of almond slices on each.  Bake for 15-20 minutes. Cookies will remain white. Dust with powdered sugar.

Today's cards were last week's technique challenge on Stampin' Addicts.  They have such a lovely fragrance and bright look...I really enjoy the technique.


You'll need Craft Ink, Clear Embossing Powder and one of the small packets of KoolAid that do not have any sweetner. (This can also be done with cocoa, but my best success is with KoolAid.
1. Mix your KoolAid and Clear Embossing Powder at an approximate 2 parts Clear Embossing Powder to 1 part KoolAid ratio. (This works for me, but feel free to do what works for you.)
2. Run your embossing buddy over the cardstock that will be any where near your KoolAid. (This allows it not to stick and get color on your card-I had a problem with this. OOPS!)
3. Ink up your solid stamp with craft ink in the color that works with your KoolAid choice...I've used the clear KoolAid as well, and it works nicely.
4. Stamp the image.
5. Re-ink and stamp as desired.
6. Sprinkle on Kool-Aid and Clear ep. Shake to remove excess powder.
7. Heat thoroughly with heat tool.
8. Be careful with the heat from your hands...it can create color spots.
9. Finish your card.
Alternatively, you can color in an image with an old blender pen and craft ink and then clear emboss for a slightly less fragrant, but still nice result. I came across a Regionals Swap of mine from 2008 with this technique this January (2010), and it was still smelling orangey!


Monday, February 22, 2010

Recipe Monday #21 and A Fun Fold February Gift Card Holder

Today's Recipe would make such a fun winter snack supper or makes a nice party snack.

Warm Up Cheese Fondue


1 can Cheddar Cheese Soup
1 small tub of French Onion Dip
3 cups of sharp cheddar cheese, shredded
½ tsp Powdered Mustard
Sprinkle of Cayenne Pepper (or Louisiana Hot Sauce)
Dash Worcestershire sauce

Combine all ingredients in a pan on the stove. Heat until smooth and melted. It is best to refrigerate over night to allow the flavors to meld, and then reheat in a tiny Crockpot to serve.
Serve with Apples, Veggies, Sourdough bread squares, popcorn and ham chunks.

Sweet Pea Designer Series Paper and Hello Again Gift Card Holders

My colors for this little gift card holder came from the swirly paper that includes these colors. You may need to click on the picture to see the teal circles on it though. The small scale of the Hello Again set is perfect for these half size gift card holders. They are literally a typical 4-1/4"X5-1/2" size card cut in half. Nothing easier than that!
The gift card is merely tucked into a cut made with Stampin' Up!'s slit punch. Perfect for a quick gift and a different shape from typical handmade gift card holders.


Monday, February 15, 2010

Recipe Monday #20 and Fun Fold Side Stair Step card

Since tomorrow is Mardi Gras, I thought a New Orleans recipe might be fun.  I got this recipe from a friend, and it is attributed to Brennan's Palace Cafe--though some alterations have been made.

White Chocolate Bread Pudding
Sauce

1/2 c heavy whipping cream
10 oz white chocolate chips

Custard
10 oz white chocolate chips (2 pkgs)
3 c heavy cream
1 c milk
1/2 c sugar
2 whole eggs
8 egg yolks
1 loaf  French bread, sliced ¼ inch thick
Custard

Heat cream in a large pot. Do not boil. Add white chocolate and remove from heat when melted.

In a double boiler over barely simmering water, beat the milk, sugar, eggs, and egg yolks together, and heat until warm.

Blend the egg mixture into the chocolate/cream mixture.
Place bread slices into a 13X9 casserole dish. Pour half of the pudding over the bread and allow it to soak in for 30 minutes. Next, pour the remaining half of the pudding over the bread.

Cover with aluminum foil and bake at 300 F for 1 hour. Remove the foil and bake for 15 minutes or until light golden brown.  It usually raises up high during the final baking.
Sauce

In a double boiler over barely simmering water, melt the chocolate, stirring until smooth.

Remove from heat and mix in the heavy cream. Keep warm. Can be stored in the refrigerator in an airtight container for reheating. (In a double boiler)

--------------------

Today's Fun Fold is this Side Stair Step Fold....A year or so ago, we all made Stair Step cards, and someone (I'm sorry I really have no idea who was first.) came up with the idea to only fold half of the card into a Stair Step.  What a fun variation!  I added the Friends mini card on the back fold, so I'd have a spot on which to sign the card.


Monday, February 8, 2010

Fun Folds February and Recipe Monday #19

Today's Fun Fold is an easy card with a small twist of fun. The card I saw was by Leslie Parks and used the retired Heartfelt Thanks Stampin' Up! set. Leslie credits Jan McClurg on the back of the card.

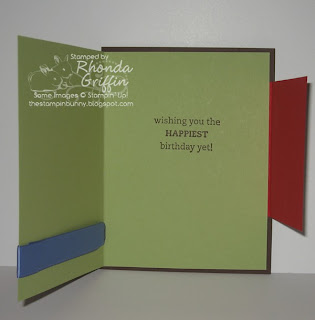
This is the masculine or gender neutral birthday card offering for February 25th's Stamp A Stack.  It is a Fun Fold that has the full card portion mounted on a contrasting (in this card Chocolate Chip) base with a latch made using the main image layer tucked under a punched medallion (in this case the Birthday Bliss stamp).  I used Stampin' Up!'s pretty Frost White Shimmer Paint on top of the "frosting" for a little sparkle, but that is of course optional.


Recipe Monday #19
Crock Pot Pork Chops

8 thick pork chops, trimmed (boneless is best)
½ c flour
1 Tbsp salt
1 ½ tsp dry mustard
½ tsp garlic powder
2 cans of chicken and rice soup
Extra minute rice (optional)
Combine dry ingredients. Dredge pork chops in mixture. Brown pork chops on both sides. Drain. Place pork chops in crock-pot or slow cooker, and cover with soup. Add extra rice, if desired. Cook 3 ½ hours on high or all day on a lower setting (according to appliance manual).
Chops will be so tender they literally fall apart—it’s not the most attractive meal to serve guests, but it is easy for an ordinary meal.


Monday, February 1, 2010

Fun Folds February and Recipe Monday #18

Thanks for stopping by this morning! This month will be Fun Folds February.....Some you've definitely seen before and maybe some new ones, but 24 in all for your viewing pleasure. Stop by The Stampin' Bunny every day EXCEPT Sunday to see a different fold.

To embellish today's Spring Up card (tutorial by Sandy Hulsart on Splitcoaststampers.com), I decided to try the faux metal technique after seeing the second card down on this stop of the Stampin' Addicts Occasions Mini Blog Hop: Deb's blog
Deb used silver embossing powder on grey cardstock for a great chocolate mold look, but I used 4 layers of silver embossing powder to create the chocolate mold look.  It was a lot of fun!

I placed Chip the Chocolate Bunny Mold on the Spring card which folds flat and is 5-1/4 inch square.  Next, I created a big shot flower embellishment and added the Happy Easter sentiment from the Well Scripted stamp set.  I also created a simple 5-1/2 inch square envelope for the card made from matching Shades of Spring designer series paper.
Today's Recipe is Raspberry-Swirl Easy "Cheesecake"

Ingredients:
Oreo Brand Cookie Pie Crust
1 8 oz package of regular cream cheese, softened
1 cup of powdered sugar
1 tsp vanilla
2-1/2 cups thawed Cool Whip
1/2 cup seedless raspberry jam (room temp or slightly microwaved)
melted chocolate chips to drizzle (maybe 1/3 cup?)

Beat Cream Cheese with Mixer until fluffed.  Add sugar and mix well.  Add vanilla and thoroughly incorporate.  Add the Cool Whip with a spoon gently.  Poor into crust.

Make 20-25 holes in cheesecake. Spoon jam in holes. Gently swirl the jam with a knife. Drizzle with melted chocolate.

Refrigerate for at least 2 hours.  Invite friends over for evening technique class and cheesecake ;).

Monday, January 25, 2010

Recipe Monday #17 Teriyaki Steak Kabobs and Okie Bunny Stampers Challenge

At my last downline meeting (I've named us the Okie Bunny Stampers), I challenged everyone to create an Easel card with the set and papers I had randomly placed in each person's bag...This is a very difficult thing to do since it stifles personal creativity a bit, but they did a great job!

Here are our cards:

Valerie Aguirre


Shawna Maxwell


Kris Kilkenny


Rhonda (ME)---Can you believe I got the easiest one? Totally luck of the draw...I let them choose first!


Today's Recipe is an easy Grilled Teriyaki Steak Kabob.

In a 1 gallon Freezer ziplock bag, begin with a clump of brown sugar (about 1/3 of a cup) and the juice from a small can of pinepple rings. (put the pineapple rings in the refrigerator until the next day)

Next add, steak (not a wonderful T-bone or Filet Mignon, but a less expensive cut such as sirloin or "strips for kabobs") cut into 1-1/2 or 2 inch cubes.  You will need less steak than you normally would if you were just eating a steak....2 steaks for 4 people for example.

I like 1-1/2 inch half rounds of zucchini, 1-1/2 inch aquares of orange (green) peppers, onion petals/slices (as if you quartered the onion) in the marinade as well.  Now add Soy Vay Brand Island Teriyaki marinade (I usually use 1/2 a bottle), slide the zip lock and marinate in refrigerator 6 hours or overnight.

Soak bamboo skewers in water (in a 13X9 inch pyrex dish) for at least 2 hours. Dump the water when you are ready to create your kabobs. 

After marinating, skewer the steak and vegetables and reserved pineapple rings (cut in quarters) alternating them. Put them in the 13X9 inch pyrex to hold any run off from the marinade and grill as soon as possible.  (You may need to pour off the liquid as you reach for veggies because it will be extremely cold.)  Serve with a baked potato or with Asian rice and side dishes.  This is a great alternative way to have steak that our girls love!