Tuesday, September 29, 2009
Countdown to Christmas!

Monday, September 28, 2009
Christmas Gift Tag Tin
Today's post is of the assortment of gift tags I'm offering at my Bountiful Christmas Buffet on October 22, 23 and 24. (See my events blog for details.) The tin below has the lovely Christmas Cocoa Designer Series paper and is $3.50.
As you can see a complete set of all the tags I am offering fit in the tin. You could also just store other gift tags you may have in it. (Currently mine are in a zip lock bag, so I really needed one of these.)Set #1-Merry: Unfortunately the picture turning is still my nemesis on blogger! I received these great swaps at Stampin' Up! convention from fellow Stampin Addict member Cris1467...she's my friend Stacy's mom :). I think they are so classy...go ahead-turn your head and see if you don't agree! :) 5 for $2
Set #2-Sweet: The tags below are a combination of the gift tag make and takes from Convention after a bit of stirring in my mind. They fold up and the "to: from:" is inside. 4 for $1.50
Set #3-Cocoa: I combined Cris's great design with loops and the Christmas Cocoa designer series paper for these cuties. 4 for $2

Sunday, September 27, 2009
Poinsettia Lattice Ornament

Saturday, September 26, 2009
Teacher Gifts

Thursday, September 24, 2009
Stampin Addicts Technique Challenge

Monday, September 21, 2009
Build A Bear Workshop Paper Bear Magnetic Tins

Saturday, September 19, 2009
Hot Cocoa Mug Card
This Cute and Cuddly stamp set Cocoa Holder can be considered a card or a 3-D project. I made this project smaller in both directions that the original, so that it would fit in a medium SU! envelope (Very Vanilla shown), but it was based upon this cute creation I found on SCS: http://kjskorner.blogspot.com/2009/08/cold-and-cuddly-meets-warm-and-yummy.html
I used the snowflakes from Branch Out with White Craft Paint, stamped Percy the Polar Bear in Versamark and heat-embossed with White embossing powder, and painted the ice with Stampin' Up!'s Frost White Shimmer paint from the Holiday mini catalog. The snowflake die cut is from the Merry Details embosslit.

Thursday, September 17, 2009
A place for you at the table....

Friday, September 11, 2009
Build A Bear Big Shot Dies

Stampin' Addicts Sketches
I love these colors for baby girl cards, and I think this Hostess set (Love Bugs) makes such sweet baby cards!! (The Hello Baby sentiment is from the Teeny Tiny Wishes set.)

Thursday, September 3, 2009
Votive Shield/Lantern
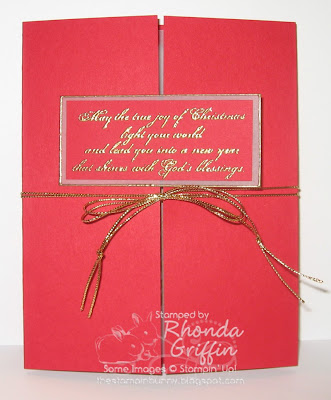
Next, score at 2-1/8 (flip & repeat on other side) so that the center panel is 4-1/4 wide and will fit in a medium SU! envelope. I trimmed about 1/16 inch off each side so that the gates met evenly, but you may not need to do that. You definitely don't want to trim first because that would affect your center panel size.
I just placed the cardstock on the top note die by eyesight. Of course the die is placed with the long side with the short side of the paper. I just made the top and bottom edges of the die even and the side scores the same distance from the edge at top and bottom. I didn't have a problem with sliding as it went through the Big Shot, so hopefully, you won't either.
Next, I inked the edge of the sentiment panel and the inside of the top note hole in the cardstock with Versamark ink and embossed with gold embossing powder. For the inside of the top note, I used the Versamarker with extra ink from the Versamark reinker.

I completed the sentiment panel by layering an embossed gold on Real Red on top of the vellum. I attached gold cord to the inside side edge of the top note hole with a mini glue dot and took it out the front and around to the back on each side. I used half of a mini glue dot under the cord at the edge where the Real Red gates meet to hold the cording neatly. Then, I tied it into a bow and added knots in each end of the cording.
Next, I added the gold brads and embossed the main image in gold onto the vellum. I embossed the star separately, cut it out and attached it with a mini glue dot. (I often mistake proof my projects by doing these types of things. :) ) Finally, the vellum image panel which measures about 5-1/8 X 4-1/8 inches is attached to the inside of the open lantern using a mini glue dot in each corner.Below are pictures of it with full/too bright flash and then with natural light and a candle in a jar glowing behind it.

Tuesday, September 1, 2009
Easy Gold-embossed Candle
Because I was afraid that the image/gold embossing powder might stick to the waxed paper during the heating of the candle to melt the tissue paper onto the surface, I flipped the image over onto its face.
Then I just placed the tissue onto the candle surface, held it on with waxed paper and heat embossed just until the wax was slightly visibly melted on the surface.
Completed project


