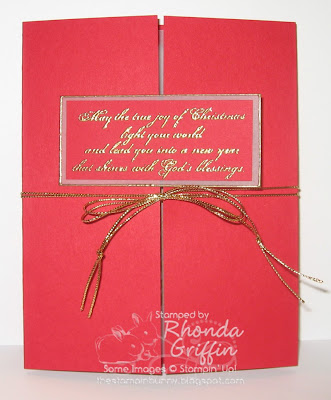
Next, score at 2-1/8 (flip & repeat on other side) so that the center panel is 4-1/4 wide and will fit in a medium SU! envelope. I trimmed about 1/16 inch off each side so that the gates met evenly, but you may not need to do that. You definitely don't want to trim first because that would affect your center panel size.
I just placed the cardstock on the top note die by eyesight. Of course the die is placed with the long side with the short side of the paper. I just made the top and bottom edges of the die even and the side scores the same distance from the edge at top and bottom. I didn't have a problem with sliding as it went through the Big Shot, so hopefully, you won't either.
Next, I inked the edge of the sentiment panel and the inside of the top note hole in the cardstock with Versamark ink and embossed with gold embossing powder. For the inside of the top note, I used the Versamarker with extra ink from the Versamark reinker.

I completed the sentiment panel by layering an embossed gold on Real Red on top of the vellum. I attached gold cord to the inside side edge of the top note hole with a mini glue dot and took it out the front and around to the back on each side. I used half of a mini glue dot under the cord at the edge where the Real Red gates meet to hold the cording neatly. Then, I tied it into a bow and added knots in each end of the cording.
Next, I added the gold brads and embossed the main image in gold onto the vellum. I embossed the star separately, cut it out and attached it with a mini glue dot. (I often mistake proof my projects by doing these types of things. :) ) Finally, the vellum image panel which measures about 5-1/8 X 4-1/8 inches is attached to the inside of the open lantern using a mini glue dot in each corner.Below are pictures of it with full/too bright flash and then with natural light and a candle in a jar glowing behind it.


2 comments:
I'll have to re-read this one but I have flagged it for sure! Beautiful!
this is completely stunning - love it!
Post a Comment