Wednesday, October 31, 2012

Evergreen set Swap Card

I made this layered card for a swap, and now we'll make it at Stamp Class this week.  It uses vellum and StazOn with plenty of Gumball Green. Certainly Celery is so versatile with many other greens, and I used white frost shimmer paint to create the sparkle on the background. I think it is easy and elegant.


Pin It

Tuesday, October 30, 2012

Stampin' Up! Tweet Leaves Thanksgiving card


This card uses the Tweet Leaves stamp and the Core'dinations Cardstock with sanding block. I enjoy this little stamp so much, and I like the look with the woodgrain embossing folder for Thanksgiving. The image was stamped with the marker to stamp technique. We'll make this card this week at Stamp Club/Technique class.

Pin It

Monday, October 29, 2012

Wonderful Winterland

I decided I couldn't resist this set due to the bunny and little girl drinking cocoa image....Then, I saw Janine Tinklenberg's card here http://stampspaperscissors.typepad.com/stamps_paper_scissors/2012/09/two-one-layer-cards.html, and I decided we could make something similar at December Stamp Club/Technique class. Her cards are one layer and Gojus phenomenal beauties, and I just used torn edges, but the idea is the same.... :)


Pin It

Sunday, October 28, 2012

Warm Winter Wishes Stampin' Up! Winter Memories set

I loved a very similar card to this by my friend Kim Bolzenthal for the Stampi' Addicts holiday catalog blog hop http://stitchinnstampinonpaper.blogspot.com/2012/08/holiday-mini-catalog-blog-hop.html, so I changed it from the lovely Soft Suede to Cherry Cobbler and simplified it just a bit by using four punched images instead of three slightly taller images. I hope you like it because we're going to make it at December technique class and club. :)


Pin It

Thursday, October 4, 2012

Ornament-palooza!

I made a version of the Ornament on page 3 of the Stampin Up! Holiday catalog using Baja Breeze and white, and I really like the soft color. It is sprayed with glimmer mist as well.


I also couldn't resist trying a 3D ornament using the new Big Shot Snowflake Bigz die.  And a little glitter always makes a snowflake better!
I'm considering offering an ornament class...let me know if you are interested!

Pin It

Monday, October 1, 2012

MOJO 261 TLC397 Weaving

 
I need to get back to doing some challenges, and these two were calling to me today! This card was inspired by the weaving challenge on SCS and the MOJO Monday sketch for this week. 
 
I had to add something to the inside of this card that I saw on Pinterest. Sadly, she did not watermark her picture, and the site didn't mention her last name in the post, so I can only say it was made by Kimber on Scrapbook and Cards today- the blog.
 
I love how subtle this little pumpkin is!  I went for an understated surprise since the front of the card has a lot of action items. :)


Pin It

Sunday, September 30, 2012

Brayer Cards Illuminate Ink and Lovely As A Tree

The Halloween card is a CASE of a swap card I received from Sara Cimbaro.  My customer asked to do the brayering technique because she missed that class last time.  Often my customers don't need very many Halloween cards, so I'm offering a choice this month of either the Christmas or Halloween version of this card.  The Halloween card is fairly true to live, but the Christmas card is better in person....you can't see in this picture that it actually uses Glossy Cardstock instead of Whisper White.

The Christmas card features Illuminate Ink and Lovely As A Tree with Dazzling Details glitter glue as well. I think everyone will like one or the other of these cards. :)


Pin It

Saturday, September 22, 2012

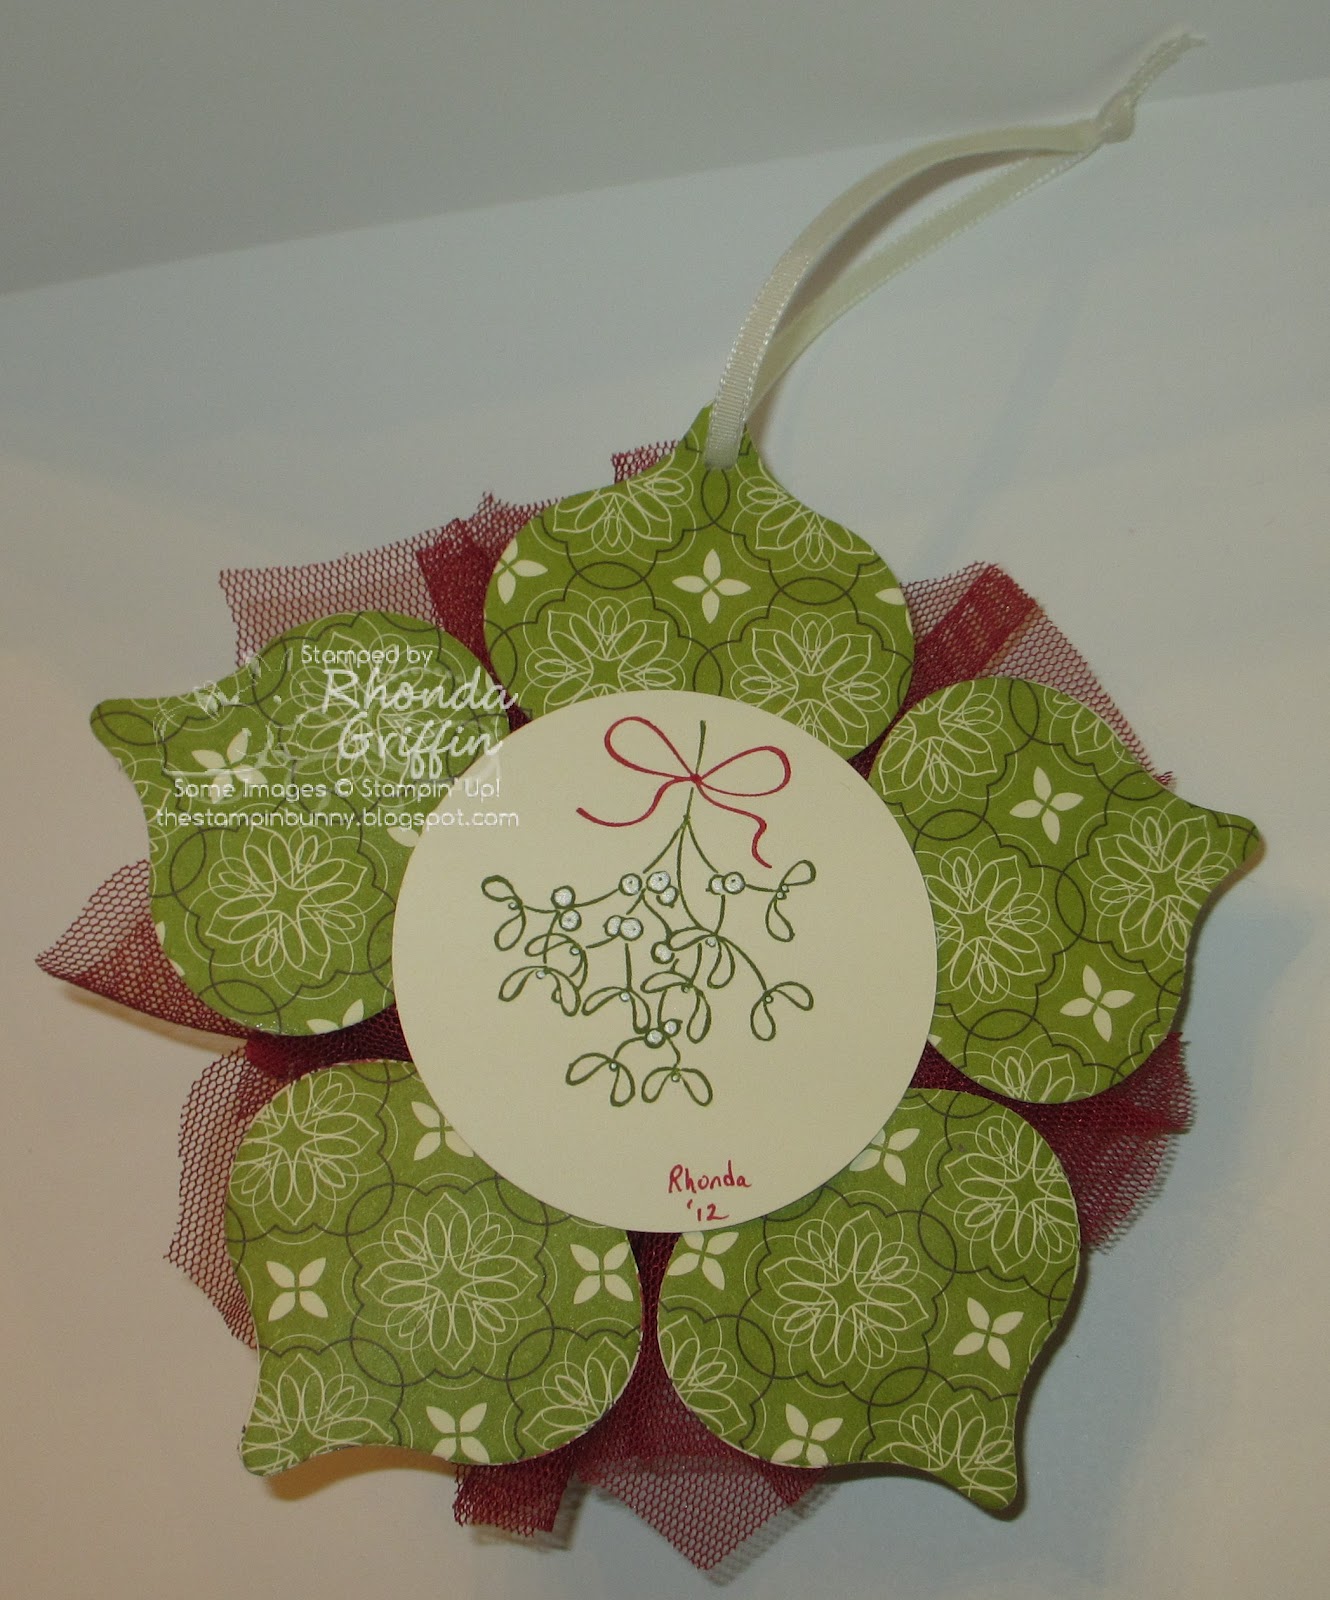
Lazy Girl's Holiday Ornament Framelit Ornament

For this ornament I started with this tutorial by Linda Heller http://lindastamps.wordpress.com/2012/08/07/holiday-catalog-ornament-2-videos/ which is an awesome "Lazy Girl's" alteration of the ornament on the front of the Stampin' Up! holiday catalog. That one is made by stamping and cutting out each image 20 times with the Holiday Ornaments Framelits Dies. I loved Linda's idea of making it from designer series paper to save time.  For the Lazy' Girl's version, one merely needs to die cut the ornament shapes rather than stamp. Frankly, I'm not sure I'd have ever tried it as shown.  My framelits also would not cut through four layers on the large ornament even with a shim. I only cut two layers at a time for both size ornaments.

I didn't mind the Cherry Cobbler scalloped tulle with the Real Red piece of Candlelight Christmas designer series paper. I thought it added depth of color. I made it shorter than the recommended 5 inches (I used 3 full scallops as my guide), and I liked having an ivory pattern for the rosette in the middle rather than a brown.  I also didn't cut the Victoria crochet ribbon in two pieces. I merely folded it over and kept the longer sides of the ribbon on the inner portion of the ornament. There are several ways you could alter it to suit you.


Copying from my friend Kris Kilkenny, I added my name and the year to the bottom of the mistletoe image I stamped to decorate the back of the ornament.


Pin It

Saturday, September 15, 2012

Banner Deer Merry Christmas

This Stamp a Stack card has a center banner as well as a banner sentiment.  I like how the designer series paper lightens up the card, but I really like the dot of Cherry Cobbler Dazzlind Details glitter glue on the reindeer's nose. :) 


Pin It


Friday, September 14, 2012

Gatefold Red Ornament

I have another Stamp A Stack card for you today....typically, these are simpler cards that can be produced relatively quickly.

I really like the cheerful colors of this card as well as the small bit of texture and repeated horizontal dots and dashes.


Pin It

Thursday, September 13, 2012

Snowflake MOJO258

I didn't quite use all the elements from the MOJO Monday challenge, but I used all of them that I needed for this card.  This will be one of the Stamp A Stack cards for next week.


Colors used were Midnight Muse and Baja Breeze....


Pin It

Thursday, August 30, 2012

Franken 6X6 page....


This is the final Frank for my Frankenflowers technique class which I have moved to September. This 6X6 page uses the Basic Gray and Basic Black striped ribbon which I love.   I think it looks cute on a plate holder for the season. I will put a Halloween picture from a previous year in it to display. (Frank isn't glued so that he can be moved in relation to the picture.)

I've already created this 12X12 layout on which to place the page after I'm finished displaying it. For class though, we'll only make the 6X6 decor page.

Pin It

Monday, August 27, 2012

Frank the treat holder...CASE of Missi Roeber

This little treat holder is made with the purse Big Shot die by Stampin' Up!  I love my friend Missi's awesome idea which was featured in this month's Stampin' Success magazine.  She also created a pumpkin and bat which are also adorable.  We'll make this treat holder at Franken Flowers/October technique class and stamp club, and I know you'll enjoy it!


Pin It

Thursday, August 23, 2012

Telescoping Beautiful Season Christmas Card


I love the look of telescoping cards, but they seemed impractical for Technique Classes due to the potential for error ~after~ coloring, but I decided to try just stamping the image first and running the StazOn only image through the Big Shot.  (Here is a link to Holly McMillen's telescoping card tutorial on SCS.)

So in my version....I layered the images together and began coloring AFTER they were all set up. That way I'm sure I saved a bit of coloring/only colored the image once, and there was no danger of a mistake ruining an image that had been colored.  If a customer makes a mistake on the Big Shot, she'll only need to re-stamp the image and try again!  I think it looks okay done this way.... :)


The first and third layers of framelits.
 
The second and fourth layers of framelits.
 
I sponged all the edges and open space in Pool Party before I began markering the image.

Pin It

Friday, August 17, 2012

Stampin' Addicts 2012 Holiday Blog Hop


Welcome to the Stampin' Addicts 2012 Holiday Blog Hop....Join us as we meander through our favorite sets in this huge supplemental catalog!  Should you get lost along your way or if you'd like to chat, you can jump in on this thread on Stampin' Addicts.  If you're following in order, you've seen lovely creations with the Joyous Celebrations set on Sharon's Created by You blog.
I chose the Watercolor Winter stamp set (page 14 of the Holiday Catalog) because I haven't worked with a two step stampin' set much lately. I hope I can show you at least a few of the great things you can do with this elegant rendering!
Stamping was made easier because I mounted the 2 step stamps so that they were lined up with the StampAMaJig.  This way I did not use an image sheet...I merely placed the SAMJ around the first stamp block after I stamped it and used the SAMJ to place the second stamp in the same position as the first for stamping. My SAMJ may have slipped a tiny bit at times, but I like the look I have.

I just markered the stamps, stamped them twice and then embossed using the Poinsettia embossing folder, Petals a Plenty.  I 2-Step Stamped the Poinsettia, and then I cut it out and added the gold pen and Dazzling Details glitter glue to the center dots...The lovely sentiment is from the Greetings of the Season Stamp Set found on page 8 of the Holiday Catalog.  I colored the SU! rhinestone bling with a Green Sharpie for each corner. (The earliest post I could find was by Mary Fish.)

Next, I think this simple card is perfect for a man's birthday...A change of sentiment and an extra layer of red would make it the perfect Christmas card of course!  The white core Core-dinations Early Espresso cardstock embossed and sanded with the Woodgrain embossing folder give it an outdoorsy feel.  I went Old School and rolled up one corner and sponged the main image and sentiment from the Family Reunion set.

Then, this pearl-bedecked blast of color allowed me to use the Labels Collection framelits and the Argyle embossing folder with Real Red and Always Artichoke.  I only stamped the sketch layer after inking in Real Red and Always Artichoke rather than adding the filler stamp on this one. Then I colored it with a Real Read marker (layered over with Crystal Effects) and Old Olive marker. The Peace on Earth Sentiment is from the Greetings of the Season set.
Finally, this tissue-stamped vanilla candle...I like having a candle option at Christmas gift class, and this set is perfect for an all over design.  I'll probably do a little bit of tweaking to the layout of the images before class, but this one does look better irl. The Holly is Always Artichoke and the Pine is Garden Green-they look the same to me in the picture. The Merry Christmas from the Greetings of the Season set made a nice focal point heat embossed with Gold.

Now, I hope you'll enjoy Sara's cutie pie creations with the Scentsational Season stamp set on her Lily's Ink Pad blog.



Pin It

Thursday, August 16, 2012

Frank and Spider

Frank has googlie eyes and green clammy skin, but he's still pretty cute.  I think the staples give it a creepy touch too. We'll make this Googly Ghouls set card at October Technique class/Frank and Flowers night....I hope everyone will be able to make it!  (Stay tuned for more Frank and Flowers.)


Pin It

Monday, July 23, 2012

Kathryn's Birthday Pleasant Poppies card


My friend Kathryn enjoys Georgia O'Keefe, so I tried to give her birthday card a slight nod that direction. I used the marker to stamp technique and then watercolored with a blender pen using Daffodil Delight, Pumpkin Pie and Real Red. I love that the Pleasant Poppies background can be used as a background or for the entire card, or you can only ink up a portion and use it as a different image as I've done here.  We are sorely lacking on Real Red and Old Olive Ribbon that dosen't have white on it this year, so I flipped the Old Olive polka dot ribbon over and pulled the "stitch" out of the Real Red stitched grosgrain ribbon so that it would look okay with my Vanilla colored card.  The background is the new Lacey Brocade from the Holiday Catalog.

Pin It

Saturday, July 21, 2012

No Peeking Deer Gatefold card swap


This is the other swap I made for the Stampin' Addicts Meet and Greet. I used the No Peeking set with the new Window Frames Framelits from the Holiday Catalog.....The Candlelight Specialty Designer Series paper stripes made a fun match with the dots on both the Jolly Christmas sentiment and the dsp. (You may need to click on the picture to see the dots.)  A little paper piercing using the new templates finished it off nicely I think. This will be so fun to make for class this fall!


Pin It

Friday, July 20, 2012

Christmas card with Beautiful Season

Oh, actually this is a simplified version of the card I sent to the Stampin' Addicts Meet and Greet Christmas card swap, but it is nice for a quicker card....I love the cherry cobbler glitter glue on the holly berries.


Here's my swap card for the organized swap.  It has the edgelit large scallop and matching edge embosser plus I cut the Apothecary Accents squarish die in pieces (Real Red under the sentiment) and made the sentiment a bit more of a focal point.

Pin It