Cut your cardstock 8 inches by 6 inches....Score the 6 inch side at 1-1/2 inches and 4-1/2 inches. Score the 8 inch side only up the the 1-1/2 inch and 4-1/2 inch scores at 1-1/2, 3 and 4-1/2 inches. Cut only up to the score lines at these same lines. Cut the top part that is above the 4-1/2 inch scores completely off as shown below.
Corner round the top and add any decorative dsp or stamping to the project. Next add sticky strip to the lower two squares for assembly as shown below. I think it is probably sturdier to leave all three of the edge boxes attached, but you might need to make the top edge even with your paper snips if they aren't even.
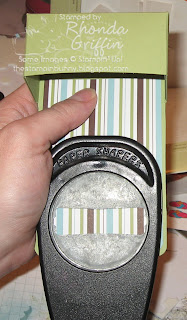
Make marks for centering your modern label punch left to right for the handle. I put it about 2/3 of an inch from the top of the cardstock.
Punch your modern label punch.
Here it is in a planning stage so that you can see the edges.
Complete decorating the toenail polish holder.
Here's a link to an updated version with a VIDEO made in 2018: Beachy Nail Polish Holder


4 comments:
Thanks for the tutorial! This is so cute!!
I love this! What a great idea!!
This is adorable who wouldn't want to receive this little package. I'm filing this tutorial away for future CASing. Many thanks,
http://nancylempinen2.blogspot.com
So cool! Thanks for sharing it!!!
Post a Comment